The Healthy, Happy Ebook

Search This Blog


Welcome!!!

Thanks for stopping by! I'm young, I'm in love with my man, and I'm a mommy. We're busy, but happy. I'll share with you how to eat natural, healthy, whole foods while balancing family life! Learn to love your food, it will love you back!
Powered by Blogger.
Showing posts with label grains. Show all posts

Thursday, September 27, 2012

One Dish Bulgar Skillet


I love one dish meals! They are simple and call for an easy clean up! I also adore skillets...the way that they mesh all the delicious flavors together...it makes me sneak leftover bites for days to come! 

I decided to try something new. Bulgar. Has anyone tried it before? It is a whole grain--a groat really from wheat specimens (I sound scientific huh) Anyways it's delicious. I had planned to make hot cereal with it, but our weekends have been crazy and I leave for work before anyone else is awake during the week. So I decided to make a skillet full of veggies and boca crumbles! Bulgar has a nice nutty flavor and it was a great addition to our pilaf skillet.

This really is up to you what veggies you want to add. I used:
1 onion
1 bunch of broccoli
1 garlic clove
1/2 yellow pepper
1 grated carrot
a large handful of chopped kale
I thought my choices of veggies really meshed nice together...
some other suggestions I thought of
broccoli slaw
olives
mushrooms
sun dried tomatoes


After you have all the veggies chopped add the onions with 1 tablespoon of coconut oil to a large skillet. Heat them until tender then add the garlic. When it is fragrant add remaining vegetables and heat for about 5 minutes. The amount of Bulgar I used was plenty... 1 1/2 cups. After the veggies are heated add Bulgar. Add 2 1/4 cups of vegetable stock and 1 tablespoon cumin and half a bag of Boca crumbles. Now you simply cover and simmer over med-low until all the liquid is absorbed. 


When it was all said and done I added 2 tablespoons of lemon juice and 1 tablespoon of parsley and some low sodium soy sauce. Serve hot and it is yummy!

Honestly I was hoping for more of a reaction from my kids. I loved every bite, they liked it but you could tell it wasn't their favorite! It is a delicious meal. If you aren't looking for vegetarian/vegan I bet chicken, turkey or shrimp would be great to add into it!

Ingredients written out a little easier for you :)
1 onion chopped
1 clove garlic minced
1 grated carrot
1/2 yellow onion
1 c chopped kale leaves
1 head of broccoli chopped
1 1/2 c Bulgar
2 1/4 c vegetable stock
1 T cumin
1 T parsley
2 T lemon juice
1 T coconut oil
1/2 T low sodium soy sauce
1/2 bag Boca Meatless crumbles

Sunday, September 23, 2012

Deep Dish Vegetarian Pizza


My goodness today has been great! Unfortunately sometimes our Sundays are on the go and busy busy, whatever happened to the day of rest in this house I'll never know. Due to Derek's school schedule he often has to work Sunday nights so rarely gets to eat Sunday dinner with us, but today was a different schedule and we finally sat down to a delicious family dinner!

I had been wanting to make some homemade pizza for awhile now. I originally was intending to make this pizza vegan, but I caved guys, I did. I used a little bit of fresh mozzarella cheese...and it was tasty!

We added the Boca crumbles and it turned into almost a hamburger type pizza without the ground beef! If you don't believe me that this tasted like ground beef, I don't know what else I can say...I am amazed at how much the Boca crumbles resemble ground beef, in texture and taste...I don't know it's been a long time since I've had it, but these are great!


I wanted to add some greens to the pizza so I added a good helping of spinach and it was perfect! This pizza is now gone, yes my kids ate about three pieces and maybe Derek and I had a few more...don't judge!

My little boy is still being funny when he eats, the fork has become the greatest toy he has. He just sits there and stabs food and scoots it all over his plate...it's cute but getting really old. Sometimes I really start to worry about his calorie, fat and protein intake...but he still is my chunk so each day I'm going to just keep trying!

You will love this pizza, it doesn't have to be deep dish- I just felt like making it that way! Adding  a delicious green salad turns this into a rockin' Sunday dinner!

Deep Dish Vegetarian Pizza

Crust
1 3/4 c whole wheat flour
1/4 c wheat germ
1 packet instant yeast
1 tsp salt
1/2 T raw sugar
1 T honey
1 c warm water
Combine water, yeast and sugar to a small bowl and set aside for 10 minutes. Combine salt, wheat germ and flour to a large bowl and mix in yeast mixture. When it is wet add honey and mix it in well. Mold to form a sort of ball in the bowl. Cover and set it in a warm place for 15 minutes. Preheat oven to 350 degrees. Flatten dough into a greased deep baking dish and poke holes with a fork all over it. Pre bake for 10 minutes remove from oven. 

Toppings
1/2 bag Boca crumbles
5 chopped mushrooms
1 minced onion
1 T Italian seasoning
1/2 can tomato sauce
1 large handful of spinach
Mozzarella cheese as desired
 In a skilled add 1 tablespoon of olive oil and add onion, mushrooms, and boca crumbles. Heat until crumbles are browned and onions are somewhat translucent.Pour tomato sauce over the pre-baked crust and add Italian seasonings, spread evenly over crust. Add mozzarella cheese, then Boca and vegetables. Bake in the oven for 18-20 minutes until cheese has melted and crust is baked through. 


I forgot to grease my pan so ours turned into more of a pizza casserole since it kind of stuck, but it still tasted delicious.
Again this doesn't need to be a deep dish pizza, it's just what we were craving! 


Thursday, August 30, 2012

Crock Pot Vegetarian Meatballs


This is an oxymoron if I ever heard! Vegetarian meatballs! Well I am here to say after experiencing this meal, no one can tell me that vegetarian/vegan meals are bland and boring! These were awesome! My little boy ate all of it! Seriously usually he never is full because he ends up throwing a lot of food on the ground, this one he actually was acting like he wanted to stop eating because he was FULL! These had excellent flavor and really were a great alternative to meatballs...obviously it didn't have a meaty taste, but texture wise they were almost twins!

These would be excellent with spaghetti or on subs! They do take some prep time outside of the crock- pot but they are still simple to make, it's just not quite like my crock pot mac and cheese where you just throw it all in! We had ours served over rice and it was fantastic! There is only one small ity, bity reason they aren't a completely vegan meal....I used onion soup mix for flavoring, and it has traces of milk so if you're looking for 100% vegan leave that mix out and season it with Mrs. Dash or other seasonings, me personally....I thought the onion soup mix made it fantastic! Meat lovers will love these too....if you're looking to add a few meatless meals in, you want to try this one.... you won't feel deprived I promise!

Crock Pot Vegetarian Meatballs

1 1/2 C lentils
2 c vegetable stock
2 cloves garlic, minced
1 packet of onion soup mix divided
1/2 onion
2 T ground flax seed
3 T cornstarch
1 can stewed or crushed tomatoes (28 oz)
1 can tomato paste
1 T Italian seasoning
1 T basil

In a sauce pan add lentils, vegetable stock, half onion soup mix and garlic and heat on med. Let it simmer for 20 minutes or until lentils have absorbed liquid. Meanwhile add tomatoes and tomato paste to the crock pot with Italian seasoning and basil. Begin to cook on high. Add chopped onion to a small skillet with small amount of olive oil and saute until cooked. Add onion, flax seed, cornstarch, remaining onion soup mix, and half of the lentil mixture to a food processor or blender. Blend until solid. Combine with remaining blender mixture and place in the fridge to cool for about an hour. Once it has cooled form into medium sized balls and place them in the crock pot. Cook for another 1 1/2 to two hours! Enjoy!

* you can also bake them if you want to for go the crock pot, just make the sauce in a skillet and bake the meatballs for 30-40 minutes at 350 degrees. I've never done it so I can't vouge for the end results! 


Monday, August 27, 2012

Quinoa Corn Chowder!

Well so far so good in the crock-pot challenge...okay so it's only day two. I have a feeling by the end of this I'm going to be reeeeeaaaalllly sick of cleaning my crock-pot out! Already though I am just loving the ease of dinner, I forget how nice it is when dinner time rolls around and I realize I'm sitting down waiting just like everyone else instead of being all over the place in the kitchen!

I love soup, stew, even stewp! They are flavorful and so easy to prepare and with the crock pot it's even better! You just throw it all in and let it cook! When I was searching around trying to find new recipes for the crock pot I stumbled upon an idea for corn chowder with quiona. here and decided it had to be on the list! I made it my own and I loved it and my kids did too. Derek liked it but he enjoys anything with jalapenos in it~  this is one of those that would be great to freeze the leftovers since it makes a ton of chowder! Awesome- two meals in one whack!

The best things I'm noticing about using the crock-pot

~ creativity in the kitchen
~ Easy clean up and easy prep
~ more time to spend with my sweet kids!

That last one is by far the best! Sometimes around dinner time my kids get a little whiny! Does anyone else know the feeling? By the time I've gotten them in their chairs with their plates in front of them I'm feeling a little stressed out! These last two nights, however, have been great. We've gone on extra walks, I've sat down and played barbies and Legos! It's been great. 

Well onto this delicious heartwarming soup!
 
Quinoa Corn Chowder
1 1/2 C uncooked quinoa
4 C water
1 can low sodium vegetable broth
4-5 potatoes chopped
1 red bell pepper
1 C frozen corn
3-4 canned jalapenos with 3-4 T of juice
1/2 onion, minced
1 T cumin
1 tsp red pepper flakes (optional)

Soak Quinoa in water for about 5 minutes, while you chop the vegetables. Add remaining ingredients to crock-pot and let it cook on high for 3-4 hours. Enjoy


Saturday, August 25, 2012

Alphabet Day's End, Zucchini Boats


Well our beloved Alphabet days has come to an end, just in time for school to start. I don't have school aged children, but my hubs is getting ready to start another fun filled semester....hahaha....not so fun actually! I guess we could look at it as one step closer to graduation! Someday it will come!

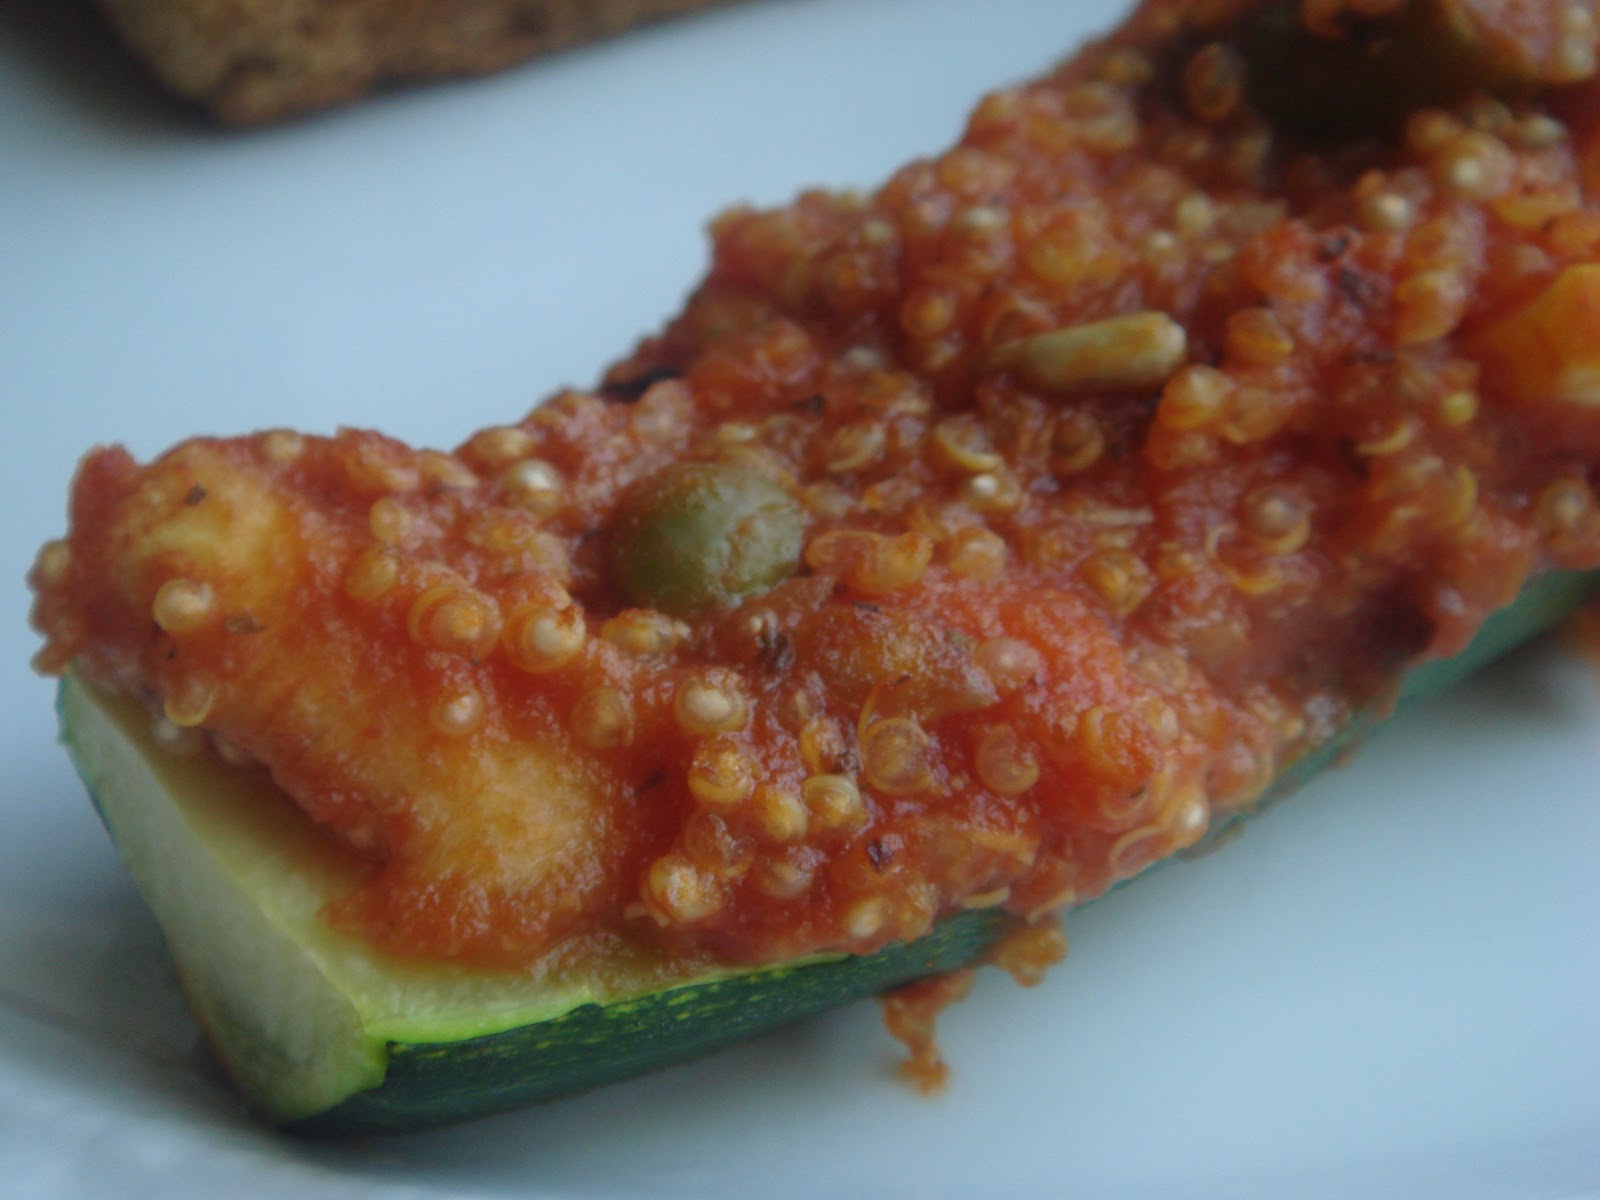
A few weeks ago my good friend described a dinner she had made out of zucchini! It sounded delightful, she put meat in hers so I wanted to find a way to make ours meatless, but have great flavor! These zucchini boats were so easy and so delicious! I was so happy with the end result. I've felt we haven't been watching as closely what we've been giving our kids the last few days since we've had some busy family get togethers or we've been on the go! So I needed, yes needed for my own guilt to pack them with something nutritious tonight! They loved these little babies, which makes mom all the more happy! These ended up reminding me of a tasty Italian meal, without all the creamy pasta sauces or carbs! So yay for us! Enjoy these easy weekend or weeknight zucchini boats! They are great!

Zucchini Boats
3-4 zucchini squash, cut lengthwise in half
1 C of canned or frozen corn
1-2 C cooked quinoa or brown rice
1 C chopped carrots
1 C peas
1/2 onion
2 cloves garlic
1/2 C green beans
1 T Italian Seasoning 
2 T nutritional Yeast (optional)
1 tsp Mrs. Dash seasoning, (optional)
1/4 C sunflower nuts, for some extra crunch
1 jar of spaghetti sauce (or 1 recipe of easy marinara sauce)

Preheat oven to 375 degrees. Spoon out the inside of the zucchini squash so just the rind is left. Place the spooned squash in a large bowl. Add onion to skillet with a tsp of olive oil and saute, add garlic and finish cooking until garlic is fragrant. Add vegetables, nuts, rice or quinoa, sauce, and seasonings to bowl and stir well. Try and have the zucchini mashed up a bit so you don't have enormous chunks of it. Spoon mixture into the rind of the zucchini. Place on a large cookie sheet and bake for 20 minutes. Serve with salad and garlic bread, yum!!!!

Sunday, August 19, 2012

Hawaiian Haystacks


As summer is kissing this year good-bye I feel the need to take full advantage of all the delicious, sweet fruit out there! Pineapple is one of the greatest gifts given to this earth! Okay, I'm sure there are a lot of other awesome things, but isn't pineapple so delicious!

I mean you throw it in some ice cream or make a tropical smoothie and you can be sitting on beach getting tan while there's a blizzard going on outside (I don't know why you'd eat ice cream during a blizzard, but in case you do...I'm sure that's how you feel)

Tonight I was missing Hawaiian haystacks. We haven't had them FOREVER! I also haven't made them with anything but cream of chicken soup before or without ham....and those two ingredients just aren't going to fly with me anymore. So I tried two sauces. The ginger vinaigrette and I made a creamy version of the dressing by using cashews. I'm still not sure which I like better. I'm also very open to another saucy idea so leave a comment if you have a tasty creation! I was satisfied with the Asian swing of these haystacks, and honestly I didn't miss the ham...yes you can do meatless and have a flavorful meal! Enjoy the last big of summer with chunky, tangy pineapple over your haystacks....you can thank me later :)


Hawaiian Haystacks

2 C uncooked Brown rice
1 C green onion
1 pineapple, chopped
1 C sweet peas
1 C corn
1 onion finely chopped
1 C shredded carrots
Rice Chow mein noodles, tortilla strips ( I used these) or nuts for some extra crunch 

* other toppings
Black Beans
Red Bell Pepper
Mango
Broccoli
Mushrooms
black olives
cashews


Cashew Ginger Dressing
1/3 C raw cashews
1/2 T ground ginger
2 garlic cloves
1/3 C soy sauce
1/4 C almond milk
1/2 tsp red pepper flakes

Cook rice in rice cooker until very tender. Two options: you can leave your vegetables raw or if you're like me and have an onion texture issue you can saute some together for a stir fry taste. I sauteed the onion, peas,  carrots and corn for 5 minutes in a skillet to tenderize the vegetables. For the Cashew dressing add all ingredients to blender and blend for 2 minutes until completely smooth. Add pineapple, choice of dressing, and vegetables to the rice. Top with chow mein noodles. Enjoy


Saturday, August 11, 2012

Peach Crumble Muffins


Muffins are such a fun breakfast to make. You can make them super bad for you, or you can add wholesome ingredients and make them a welcome guest to your stomach!

My friend from work handed me a delicious looking bag of fresh peaches from her tree yesterday! Some of them didn't make them home, I ate them! Some of them barely made it in the front door, the kids ate them! Others are being saved for peach soft serve, they will be eaten! But this morning a select few were made into a delicious peachy crumble muffin! I didn't look at a recipe for these muffins, this is all me. I was very happy how well the sweetness in these muffins complimented the grains so much! I'm happy to serve them to my family, even though my crazy husband doesn't really like peaches, how can that be?

He ate them though and said they were good, he added they weren't his favorite like the zucchini muffins, but they were good. For someone who doesn't like peaches, that makes me perfectly happy!

All the grains rolled and snuggled next to the sweet peaches and syrup call for one great start to the morning! Feel good about your food without sacrificing taste! It's a wonderful feeling!

Peach Crumble Muffins

2 C whole wheat flour
1/2 C cooked quinoa 
1 tsp baking powder
1/2 tsp baking soda
1/2 T cinnamon
1/2 tsp nutmeg

Wet 
1/4 C maple syrup (or agave)
1 tsp vanilla
1 C almond milk
1/4 C applesauce
1 tsp cider vinegar
1 1/2 C chopped peaches
1 Flax-Chia egg (1 T ground flaxseed, 1 tsp Chia seed + 3-4 T water)

Crumble Topping
1/2 T coconut oil
1/8 C coconut Sugar
1 T cinnamon

Preheat oven to 350 degrees. Make flax-chia egg and set aside into small bowl. Combine all dry ingredients into a large bowl.  Mix remaining wet ingredients with flax egg and add to dry ingredients. Fold ingredients together well. Spoon batter into muffin tins. Add crumble ingredients to a small skillet, mix together until all the oil is melted and absorbed into the sugar and cinnamon. Sprinkle topping over the top of the batter. Place in the oven and bake for 15 minutes. Let cool for 10 minutes before serving! Enjoy


Thursday, August 9, 2012

Teriyaki Chicken Lettuce Wraps


Crisp, chilled lettuce. You complete me! Summer is a beautiful time to take advantage of green salads and all the wonderful nutrients they give our bodies~

I also love lettuce wraps. I love having everything I would put on a sandwich without the bread and it really gives people with a gluten free need a list of tasty options.

These passed few days I've felt myself stretched thin and I am feeling it in my muscles today. I probably know I haven't been drinking as much water as I should be and I might have been eating too much of my mint carob fudge! When I make these silly decisions I feel it in my back. The only way to describe it is it feels almost like a charlie horse right in the center. Luckily I work in an environment where I'm surrounded by occupational therapists and physical therapists. However, I still came home really sore, but at least I've been guzzling my water like a maniac today :)

When the soreness sets in I bring out the Crock Pot! Simple, no brainer, dinners! This was totally simple and totally tasty! I savored each bite and loved the lettuce wrap addition! We used quinoa as our grain filling and it was perfect! I love flavor without a lot of ingredients that I had to think about and throw in. This meal contained basically my two favorite things, lettuce and quinoa. ~bliss! Play around with this, it's the slow cooker, you can do almost anything you want :) Enjoy

Teriyaki Chicken Lettuce Wraps

1 lb organic boneless skinless chicken breast
1/2 C water
1/2 C low sodium teriyaki sauce
2 garlic cloves minced
1/2 tsp ground ginger
1/2 tsp red pepper flakes
1 C cashews (optional)
1 head bibb or romaine lettuce

Combine all ingredients to Crock pot except the lettuce. Cook on low for 6-8 hours. Cook on high for 4-6 hours. Serve with quinoa or brown rice. Wrap chicken and grain in lettuce leaves. Use remaining juice from Crock pot as a dipping sauce! Enjoy


Tuesday, August 7, 2012

Red Pepper Linguini


Isn't pasta just a srumptious, cozy comfort food! I love spooning the noodles and all the flavors that one bowl can hold! I always loved creamy, buttery Alfredo sauces before changing our eating habits! I was so discouraged when I thought I would never again enjoy a creamy, satisfying sauce over noodles! Since then I have been proven wrong on numerous occasions and thankfully I've been proven wrong once again! 

Although I am a HUGE pasta lover I do try and limit the amount we have simply for carbohydrates. When we do have pasta though I take advantage of the golden opportunity I have sitting before me to add amazing ingredients to my dish to make it whole and healthy! If you are new to natural eating, sauces are a great way to throw in some extra veggies or healthy fats! They blend together beautifully and make you wanting leftovers the next day and the next day!

We are still continuing our alphabet journey and today just happens to be the letter "R"! I thought of this pasta to make up for the meal, but tonight I'm also whipping up some delicious raspberry chocolate drops, post to be continued! So after brainstorming how I wanted to make my sauce I decided to add some flavorful red peppers to qualify for "R" day! This was an amazing addition if I do say so myself. The pesto sauce was beautiful and had a kick to it, the peppers simply made it more pronounced, while adding some color! 

My kids LOVED this pasta, my son had thirds! I wasn't sure how it would all come together with the avocado, but it was great. A tip from seeing the leftovers, maybe just make enough for one night. The reheated leftovers weren't bad tasting, my son again just loved them, but the avocado flavor starts to come out more and more. I think the longer it stays in the fridge, the less likely it will become a good tasting leftover! Just my opinion. 

Enjoy~

Red Pepper Linguini 

1 lb whole wheat linguini
1 red bell pepper
1 tsp red pepper flakes
2 pitted avocado
3 C fresh spinach
4 garlic cloves
2 T lemon juice
1/3 C crushed tomatoes or sun dried tomatoes
2 T basil
2  Italian Seasoning
1/4 C water

 Cook Linguini according to package directions. Drain and set aside.
Chop red pepper into small chunks and set in a bowl off to the side. 

Combine remaining ingredients to blender or food processor. Blend until completely smooth. About 2 minutes. 
There are two ways to do this. You can serve the sauce right then with the warm pasta or you can bake it. If you want to for-go the baking, add the chopped bell pepper to your blender along with the other ingredients.
If you choose to bake it (this is what we did) Combine linguini, sauce and chopped red pepper to casserole dish
Make sure you coat the pasta well. Heat oven to 350 degrees. Cover and bake pasta for about 18-20 minutes! 
Serve warm with salad!


Sunday, August 5, 2012

Carrot Muffins


This morning was a good day for muffins. I'm tired of my kids eating so much cold cereal, so I've set a goal to make some different breakfasts to shake it up a bit. I didn't know what type of muffin to do, then I saw I had a bag of shredded carrots and thought, yeah that would be good. I decided to make carrot muffins. I did a quick search here and found a good sounding recipe. I did change some things around. I really liked how they turned out, my son ate 1 1/2, but my daughter was not thrilled to see carrots in her muffins. It did turn into a battle. I had to do the typical lines..."You need to eat one bite before you get down, just try them you'll like them, you can pull the carrots out." Things like that. It probably was my fault I didn't cut up or shred the long shredded carrots at all. I know if they were hidden better it wouldn't have wigged her out so much. I don't know what the deal is though she loves carrots. Hmmm... oh well I guess it's just one of those things.

These were pretty simple to make, but next time I will make the carrot chunks A LOT smaller. I didn't mind it, but I guess I can see why kids get weirded out when they see big stringy vegetables poking out of their breakfast :)

Carrot Muffins

2 C whole grain flour (I used spelt)
1/2 tsp baking soda
1/2 tsp baking powder
2 tsp cinnamon
1/4 tsp nutmeg
1/4 C coconut sugar
1/2 C ground flaxseed
1/2 tsp salt
1/2 C applesauce
2 C finely shredded carrots, very fine :)
1/4 C raw honey
1/2 C almond milk
1 T apple cider vinegar
1/3 C semi sweet chocolate chips

Preheat oven to 350 degrees. Combine all dry ingredients into medium bowl. Mix carrots, honey, milk, vinegar, and applesauce in small bowl. Combine wet ingredients with dry ingredients. Mix well. Fold in chocolate chips. Spoon batter into greased muffin tip so they are 3/4 full. Bake for 18 minutes, until tops are golden. Enjoy!


Saturday, August 4, 2012

Whole Grain Blender Waffels (Gluten Free)


Good Morning!!!!!!! It's Saturday and there is no where else for me to go this morning except lounging around eating AMAZING food with my sweet little family! The weekends are when I usually try and make a larger breakfast, obviously because I have more time in the mornings!

A few days ago my husband told me he was craving some big, syrupy, waffles or pancakes...I think he wanted a lot of butter included in that too :) well I couldn't help him with the butter but I could help him with the big, syrupy waffles!!!! I found these tasty little things here and I only changed one ingredient since I didn't have any concentrate juice and I was out of dates! So what did I add....honey. Super simple but I think they tasted wonderful, they're gluten free so I think that's saying something!

Whenever we'd stay over at my parents house and we had pancakes or waffles my mom always had her "special" pancakes or waffles that were gluten free! We never tried them, since they were sure to be nasty (even though she just loves them) well if they taste like these gluten free waffles I think I may just battle it out over the gluten free "special" waffles with my mom :)!  These are quick and easy and ready in a matter of minutes. You throw everything all at once into your blender (you need a high powered one, I've got some links for blenders at the bottom) and a minute later you have your waffle batter! These are wonderful served with either maple syrup or my strawberry syrup that you can find here Easy Peasy!


Whole Grain Blender Waffles

2 C water
1 T honey
1 C oats
1/4 C millet or corn meal (I used corn meal)
1/4 C ground flax seed
1/4 C raw cashews
1 T cornstarch
1/2 tsp salt

Place all ingredients into blender and blend on high for one minute or until everything is very smooth and blended together.


 Pour batter into a heated waffle iron. They are done when they are very brown and slightly crispy on the outside! Serve warm with fresh or frozen fruit on top!! Enjoy!


Thursday, August 2, 2012

Lentil Taco Pie


I really don't like the days when I look at the clock and I see it's five o' clock and I haven't even given our dinner any thought. I dislike it even worse when I look around and can't think of anything to make for a long time all the while slowly the kids are starting to complain, they are starting to beg for food, they are starting to grab my legs, and then the crying starts. Okay that is when stress levels get heightened! Well, without optimism, I'll look one more time in the very back of the cupboard and what do I see? My hidden jar of lentils, here to save the day!

I absolutely adore lentils! They are so versatile and very nutritious. Lentils are packed with protein, B vitamins, they aid in heart health, they have great fiber and regulate blood sugars and they can replenish our iron stores, so for those who don't eat a lot of red meats (me, me, me) they are wonderful!

I decided to whip up a taco pie since I found some corn tortillas, red peppers, spinach and frozen corn. I was a little worried since I didn't have taco seasoning, but I played around with other spices and I think it actually packed a little bit too much heat for my liking :) I thought of the idea since I've made lentil burritos, so it's not that different in my mind! Probably not my husband, he's a heat fanatic. My kids gobbled this meal right up...the best part...it's vegan, and gluten free and gives them a nice punch of protein! Score for mom or lentils...

Lentil Taco Pie

1 C lentils
2 C water
2 C brown or wild rice
1 red bell pepper
1 1/2 C frozen corn
1/4 C nutritional yeast
1/2 T cumin
1/2 T chili powder
1/4 tsp red pepper flakes
1/2 C jar salsa (optional, I didn't use it)
4 corn tortillas

Preheat oven to 350 degrees. Heat lentils and water in sauce pan and cook until tender and water is absorbed. Meanwhile add rice and another 2 cups of water to skillet, cover and simmer for 10 minutes. Add vegetables, spices, and lentils to skillet and simmer another 5-10 minutes, until water is mostly absorbed and rice is tender. Place two tortillas on the bottom of baking dish and spread a layer of taco filling over. Add another layer of tortillas and top it with remaining taco filling. Cover and bake for 15-20 minutes, until blended together. Top with lettuce, tomato, avocado and salsa! Enjoy


Wednesday, August 1, 2012

Crock-Pot Orange Chicken


Alrighty, so right after the post about me possibly following a Vegan diet, here was dinner tonight...Orange Chicken :)! Well it's a work in progress.
This actually was very, very tasty. We used this for our "O" day for Alphabet Days. I loved the orange flavor so much I didn't want to share! It's a very simple recipe too which makes it all the better! Throw it in the crock-pot for a few hours with everything and there you go. I served ours with quinoa and green beans. It actually tasted like orange chicken, I don't know about you but whenever we would go out and get Chinese and we would order orange chicken, it never tasted like orange, it tasted just like a saucy chicken. I don't know it's been awhile since I've gone out for Chinese, maybe things have changed!

My kids were being funny tonight, I don't think it was the flavor, but they wouldn't eat. My daughter kept telling me she wasn't hungry and just didn't want to eat, I don't know they've had about 500 bananas and strawberries today maybe that's why. Here's a picture for a budget post. I ran to the store after work since we were a little low on fruits and I walked out with a stock pile! When things are on sale stock up, freeze, bake whatever! I got all this for under $15, the strawberries were $1 each at Smith's and the raspberries were $1.50, raspberry soft serve tonight, probably!!!! Sorry, for people all over the country and world, I don't know about your prices or if they would be similar at other Kroger stores. To save some money though take advantage of sales on produce and store it accordingly when you get home! I bought this many bananas because my kids are monkeys, seriously these might last us 4 days at most!

 Anyways  I enjoyed this recipe a lot. Perfect freezer meal and perfect for those busy days! It also makes your kitchen smell amaaaazing! I hope you enjoy it!


Crock Pot Orange Chicken

1 lb boneless, skinless chicken breast
1 navel orange with skin
1/4 C raw honey
1/2 tsp cumin
1/4 C low sodium Teriyaki sauce (optional)
2 T cornstarch

Add chicken to crock pot. Peel orange and add peels, squeeze as much juice as possible from the orange as possible. Add cumin, honey and teryiaki sauce if your are using it. Cook on low for 8 hours, or high for 4-5 hours. Remove chicken from crock pot when it is finished add cornstarch to the sauce to thicken it up. Serve with brown rice or Quinoa! Enjoy


Monday, July 30, 2012

Mini Vegetarian Shepard's Pies


 There was a hint of Fall in the air for me today! It was pretty mild this morning as I left for work, and it hadn't reached it's blazing summer heat as I was leaving work. I feel I'm never quite satisfied with the seasons and holidays.
When it gets to this point in the summer I start planning for my fall and Christmas festivities. I'm already planning food! Derek and I discussed our Halloween costumes today! They're going to be great by the way. I just can't wait for the Holidays. However, the day after Christmas I'm usually wishing the icy snow away and looking forward to St. Patrick's Day and Easter, and for sure by the time the Bi-polar spring is in full swing (as in we get all four seasons in one day) I'm praying for Summer weather! It's a vicious cycle.

Well today I wanted to have a little "fall like" comfort food for our dinner, and of course it had to be something mini size for our ABC "M" day! I have become the BIGGEST fan of vegetarian Shepard's pies ever since I made my first one! This is just a fun remake of my original posting. This is not a gluten-free version due to the biscuit crust, however the traditional Shepard's Pie is. So check out that recipe here, oh it was one of the first recipes I posted....ahhh a sentimental moment!

Anyway, I love every single bit of the zesty sauce covering all the delicious vegetables that get crammed into this little baby! If it wouldn't add to my hips so much I'd probably eat all of them! Trust me I've eaten the whole original Shepard's pie by myself over a period of 24 hours, it's ridiculous!!!

These were a fun thing for the kids to see, I think they thought it was fun that their dinner was in a little cup from a muffin tin! From my experience with my two kids, this is an excellent way to sneak in those veggies and have them gobble them up. I think it's the mashed potatoes, if it's covered in fluffy potatoes, whatever is underneath it must be just as amazing right! Well whatever it is it works in this house. This meal is almost pure veggies so I'm happy!

I used a garlic biscuit crust, I really liked the taste. The only issue I had was removing the pies from the muffin tin. They fell apart pretty easily. I didn't grease my tin hardly at all so that could play a part, but I also think the biscuits just crumbled under everything and me trying to pop them out. It obviously didn't effect the taste at all, but if you're looking for a pretty appearance I suggest greasing the pan a little heavier than I did. I was really excited about sharing this recipe since it fits right along with my budgeting tips on eating healthy for less. I used some left over vegetables from  my veggie kabobs from two days ago, which is one of the tips I gave. Plan your left overs so that you can use them in other meals throughout the week! This will save money and make sure you don't waste your food. After I had assembled all the mini pies, I still had mashed potatoes left and the vegetable filling, so what do you do with that. I stuck it in a disposable baking dish, covered it really well and plopped it in the freezer! So now I have an original Vegetarian Shepard's Pie waiting for me to stick in the oven in the coming weeks. The sauce is a little different in this recipe, but it will still be wonderful! Easy peasy! You can view my budget post here, there will be more on budgeting to come since it was so popular!

Mini Vegetarian Shepard's Pies
5 potatoes, peeled
1 C low sodium vegetable broth
1 can tomato paste
1 broccoli crown, chopped
1 zucchini
1 small yellow squash
1/2 asparagus bunch
1/2 yellow onion
2-3 carrots chopped, or 1 C shredded carrots
1/2 T cumin
1/2 T Mrs. Dash seasoning
1 tsp red pepper flakes
salt and pepper to taste

For the crust
2 C whole wheat flour
1 tsp raw cane sugar
1 T baking powder
2 garlic cloves, minced
1/2 tsp salt
1 egg
3/4 C almond milk (or any milk you'd like)
1/3 C margarine or butter (I used vegan margarine and it was perfect)

Wash and peel potatoes. Chop into small pieces and cover with water in a saucepan. Bring to a boil and simmer for 10-15 minutes until the potatoes are fork tender. Add small amount of margarine or butter and small amount of milk. Use beater to whip potatoes. Beat until frothy. Chop all the vegetables to the desired size and set aside with potatoes. 
Meanwhile, preheat oven to 425 degrees. For the crust add all the dry ingredients to a medium sized bowl. Melt margarine and add to the dry ingredients. Stir until crumbly.  Combine egg and milk in a small bowl and beat together until egg is well mixed. Add into the dry ingredients. Beat or stir until well combined. Grease muffin tin and spoon in batter 1/4 full. Pre-bake for  4-5 minutes. Remove from the oven and set aside. Add vegetables to skillet with seasonings, tomato paste, and vegetable broth. Simmer covered for 5-7 minutes until just tender. Using a spoon make wells in the biscuits in the muffin tins since the dough should not be baked through.
Add vegetables to the well in the crust and top with mashed potatoes.

Place in oven and bake for another 7-8 minutes, until potatoes are golden and biscuits are baked completely through! Let cool for 10 minutes before removing from the muffin tins. Enjoy!!!!


Sunday, July 29, 2012

Strawberry Sweet Bread w/ Strawberry Glaze


Are you ready to get your grain on? This sweet bread was marvelous, but it is full of yummy grains, and a surprise ingredient....quinoa! Yes, cooked quinoa! I have never used quinoa in a baking before. I've seen the quinoa flour and pasta, however I've never thought to use cooked quinoa.

This recipe is a combination of many searches and mashing them all together to satisfy my tastes! I found some ideas at ohsheglows.com, poorgirleatswell.com, and my best friend google!  I knew a few things I wanted, I wanted it to be egg less, healthy (obviously), I wanted a glaze and I wanted a berry or fruit. I couldn't decide between strawberries or cherries for awhile, finally I decided on the strawberries (I do think cherries would be great in this too, with a cherry glaze...maybe some chocolate chips....light bulb!!!! Cherry chocolate chip bread!!! To be continued...)

Well after I had compiled a list of ingredients I stumbled upon the idea of adding cooked quinoa to your baking, since apparently it adds moisture, more healthy grains, and flavor! Hmmmm, well the purpose of my blog is to think outside the box when feeding ourselves and our families healthy. So I decided to try it. Whenever I make up a recipe I get very unorganized in my baking, maybe I should do a post on how to simplify baking and cooking so clean up is easier...it will say..."Don't bake like ME!"


As I was starting the process of making the bread, I had those negative thoughts come into my head, just like with the veggie kabobs, I kept thinking, your taking a risk with just mashing together multiple recipes, you just finished doing a budget post and now here you are going to waste all your food!

Well I'm here to tell you when the negativity bug comes knocking, punch him! A lot of times when we have just a basic idea in mind, sometimes that is when we create our tastiest creations! I will admit I've never been awesome at glazes, they never seem to get really thick for me and they tend to absorb into baked good a lot, not that it hurts the flavor it just doesn't look as pretty. I let things cool and everything so if anyone has any tips let me know! This bread turned out really tasty! I really enjoy things where you can taste the health of it, but it still has an enjoyable sweetness to it! And this had it all for me. The glaze made some bites taste almost like a doughnut...I mean that is awesome right! It was a pretty pink color, so as soon as I saw it I thought, 'what a nice Valentine's Day Bread' and it would be, but we'll enjoy it in July as well :)  Okay enough chit chat, on to the recipe! Enjoy this, just save some for everyone at your house :)

Strawberry Sweet Bread w/ Strawberry Glaze
2 C flour (I used whole grain Spelt Flour)
1 C quinoa, cooked
2 tsp baking powder
1/2 tsp baking soda
1/4 tsp salt
1/4 tsp nutmeg
1/2 tsp cinnamon
1 T ground flax seed
2 T raw cane sugar (optional)
1/2 tsp apple cider vinegar
3/4 C almond milk (or any non-dairy milk)
1 C strawberries
1 tsp vanilla
1/4 tsp almond extract
1/4 C agave 
1/4 C raw honey (you can also use maple syrup)
1/3 C oil (I used olive oil)

Glaze
1/2 C confectioner's sugar (powdered sugar)
4 frozen strawberries


Preheat oven to 350 degrees. Cook quinoa completely. Set aside to cool. Combine almond milk, vinegar, agave, honey, almond extract, vanilla, and oil to a small bowl. Set aside while you combine the dry ingredients. Add all dry ingredients, except strawberries, and including quinoa to a large bowl. Add wet ingredients to dry ingredients and mix well until blended, add strawberries. Be careful not over mix the Spelt flour, it's a delicate flour. Pour dough into a bread pan and bake for 30-35 minutes or until completely cooked through. Remove and let cool on a cooling rack. After bread has cooled slightly, begin to assemble glaze. Add sugar to a small bowl. Make sure strawberries are thawed (I actually microwaved mine for a minute to make them mushy) Smash out as much juice as you can and pour it into the sugar, try and keep as many chunks out as possible, I ended up with about 4-5 T of liquid. And after awhile I had even more, that I didn't use, so if you want a lot, keep mushing them! Pour glaze over the top of the bread! Enjoy


*Question for everyone, I've noticed there is a debate whether or not honey is vegan. I know it's made from Bees so I guess in that sense I see how it isn't, but I would love others opinions, I'm not sure if I should call things that use honey vegan?

Saturday, July 28, 2012

"Lazy Lime" Breakfast Smoothie


It's the letter "L" today, I'm not sure if I'm going to do a letter tomorrow, I'm having a tough time finding time to do alphabet day on the weekends so it might just be a Monday-Friday deal :) Today is my "Lazy Lime breakfast smoothie! I have never really been able to take a lovely picture of a smoothie, this one is no different I'm afraid. It was much greener than the picture lets on and more appetizing to look at! I'm working on my photography skills guys :)

 I call it lazy because you really can't beat the speed and ease of a smoothie, and everyone in my family drinks one, so no need to try and make a huge breakfast for everyone! It's lazy, but oh so healthy! I had never used lime in my smoothies before, I liked the subtle hint of lime. If you want more lime taste you might want to throw some zest into yours!

The great thing about smoothies is how many nutrients you can back into them or proteins and all you really taste is a super yummy drink! I used to feel that I needed yogurt in my smoothies at all times, but now I am totally satisfied just stuffing it full of bananas, fruit, and I use almond milk a lot in my smoothies! I always add Chia seeds, and Flax seeds to my smoothies to get the calcium and omega 3's.

P.S. I may start a rumor that there may be a giveaway on here soon....just sayin' :)

Lazy Lime Smoothie
1 fresh banana
1/2 frozen banana
1/2 C frozen strawberries
1/2 C frozen blueberries
2 limes, juiced
2-3 large handfuls of spinach
1 T ground flax seed
2 T Chia seeds
Oats, for top (optional)
1/4 C water
1/4 C almond milk

Combine all ingredients, apart from oats, to blender. Blend on high until completely smooth! About 90 seconds. Add oats and fresh lime zest to the top if you'd like!!! Sleep in, be lazy, it's a weekend :)


Tuesday, July 24, 2012

Honey Oat Muffins


I feel like the last few days we've been on the go and I haven't been able to stick to my typical eating routine. I haven't been bad with my food choices, at the baby shower the other day I had no desserts and only had my couscous salad and a green salad, I went to a movie last night with my husband, I did have some sips of his root beer, but that's it! Even after trying to be really good on the go, the up and down eating schedules and not having typical small meals throughout the day has sent my stomach for a loop and my energy levels down, I've been craving whole natural foods today, so for snacks I indulged on nectarines and super bars, for lunch I had an awesome spinach salad with chia seeds and today for my family I made these Honey Oat muffins! They are full of yummy healthy ingredients, they taste like naturally sweetened, so they aren't quite as sweet as my zucchini muffins or blueberry muffins, I used agave in those these have raw honey, but I needed just some overall good health food!

I am happy that it has come to this point with me, that a couple sips of root beer or some missed veggie servings really cause a change in my energy and feeling good!! That must mean somethings going right with the way we eat! It just is more proof to me that our bodies really do want natural, wholesome foods, they don't throw a fit when I eat those, but if I go without you bet this body is going to have something to say.

I'm glad these muffins turned out, I wanted to make them for "H" day for my family but I also wanted to make them vegan! I decided to see if I could master making muffins from my own mind without eggs, you know I think I did it! I think I should have taken them out a little bit sooner, but they still tasted great!

Honey Oat Muffins
1 3/4 C whole wheat flour (or whole wheat pastry flour)
1/4 C ground flax seed
3/4 C oats
1/2 tsp cinnamon
1/4 tsp nutmeg
1 1/2 tsp salt
1/2 - 3/4 C honey (depending on desired sweetness)
1 C almond milk
1 T apple cider vinegar
1/4 C applesauce
1 tsp vanilla
1/4 tsp almond extract (optional)

Preheat oven to 375 degrees. Combine almond milk and vinegar in small bowl and set aside. Combine all dry ingredients in large bowl. Mix vanilla, almond extract, applesauce and honey with almond milk. Make a well in the dry ingredients and add wet ingredients. Fold everything together so that it is well mixed. Pour dough into paper muffin liners or grease muffin tin with coconut oil and pour dough in. Bake for 15 minutes or until golden. Let cool for 10 minutes.

 Optional- you can sprinkle some raw cane sugar on top before you bake just for an extra sweet taste. Also add nuts or raisins if you'd like! Enjoy